You’ve just received your very own saliva collection kit- congratulations! Now you’re left with the somewhat daunting task of providing a sample. Set aside etiquette concerns and start thinking about your favorite meal or snack- let’s get those saliva glands into full gear!
Step 1: Nothing by mouth for 30 minutes
I hope you read all the instructions included in the kit first, but pause here if you’re not sure. We also have this great video. Please do not have anything by mouth for 30 minutes (or more) prior to collecting your saliva sample.
Nothing by mouth means nothing in or near your mouth that could provide another DNA sample or dilute your own sample. This means no eating, drinking, smoking, chewing, kissing, or toothbrushing.
We want to make sure it is only your sample and we have lots of your DNA to test. So this includes no water to drink or wet your mouth; no breath mints, gum, or mouthwash to make sure your sample is “fresh”; no kissing partners, children, or pets, etc- nothing!
Ok to have: Chapsticks, lipsticks, breakfast an hour ago, ditching the gum at least 30 minutes earlier, taking pills at least 30 minutes before the sample collection, being pregnant, being sick, etc. You can have that snack nearby to help you salivate, but wait to enjoy until after you’ ve completed this task!
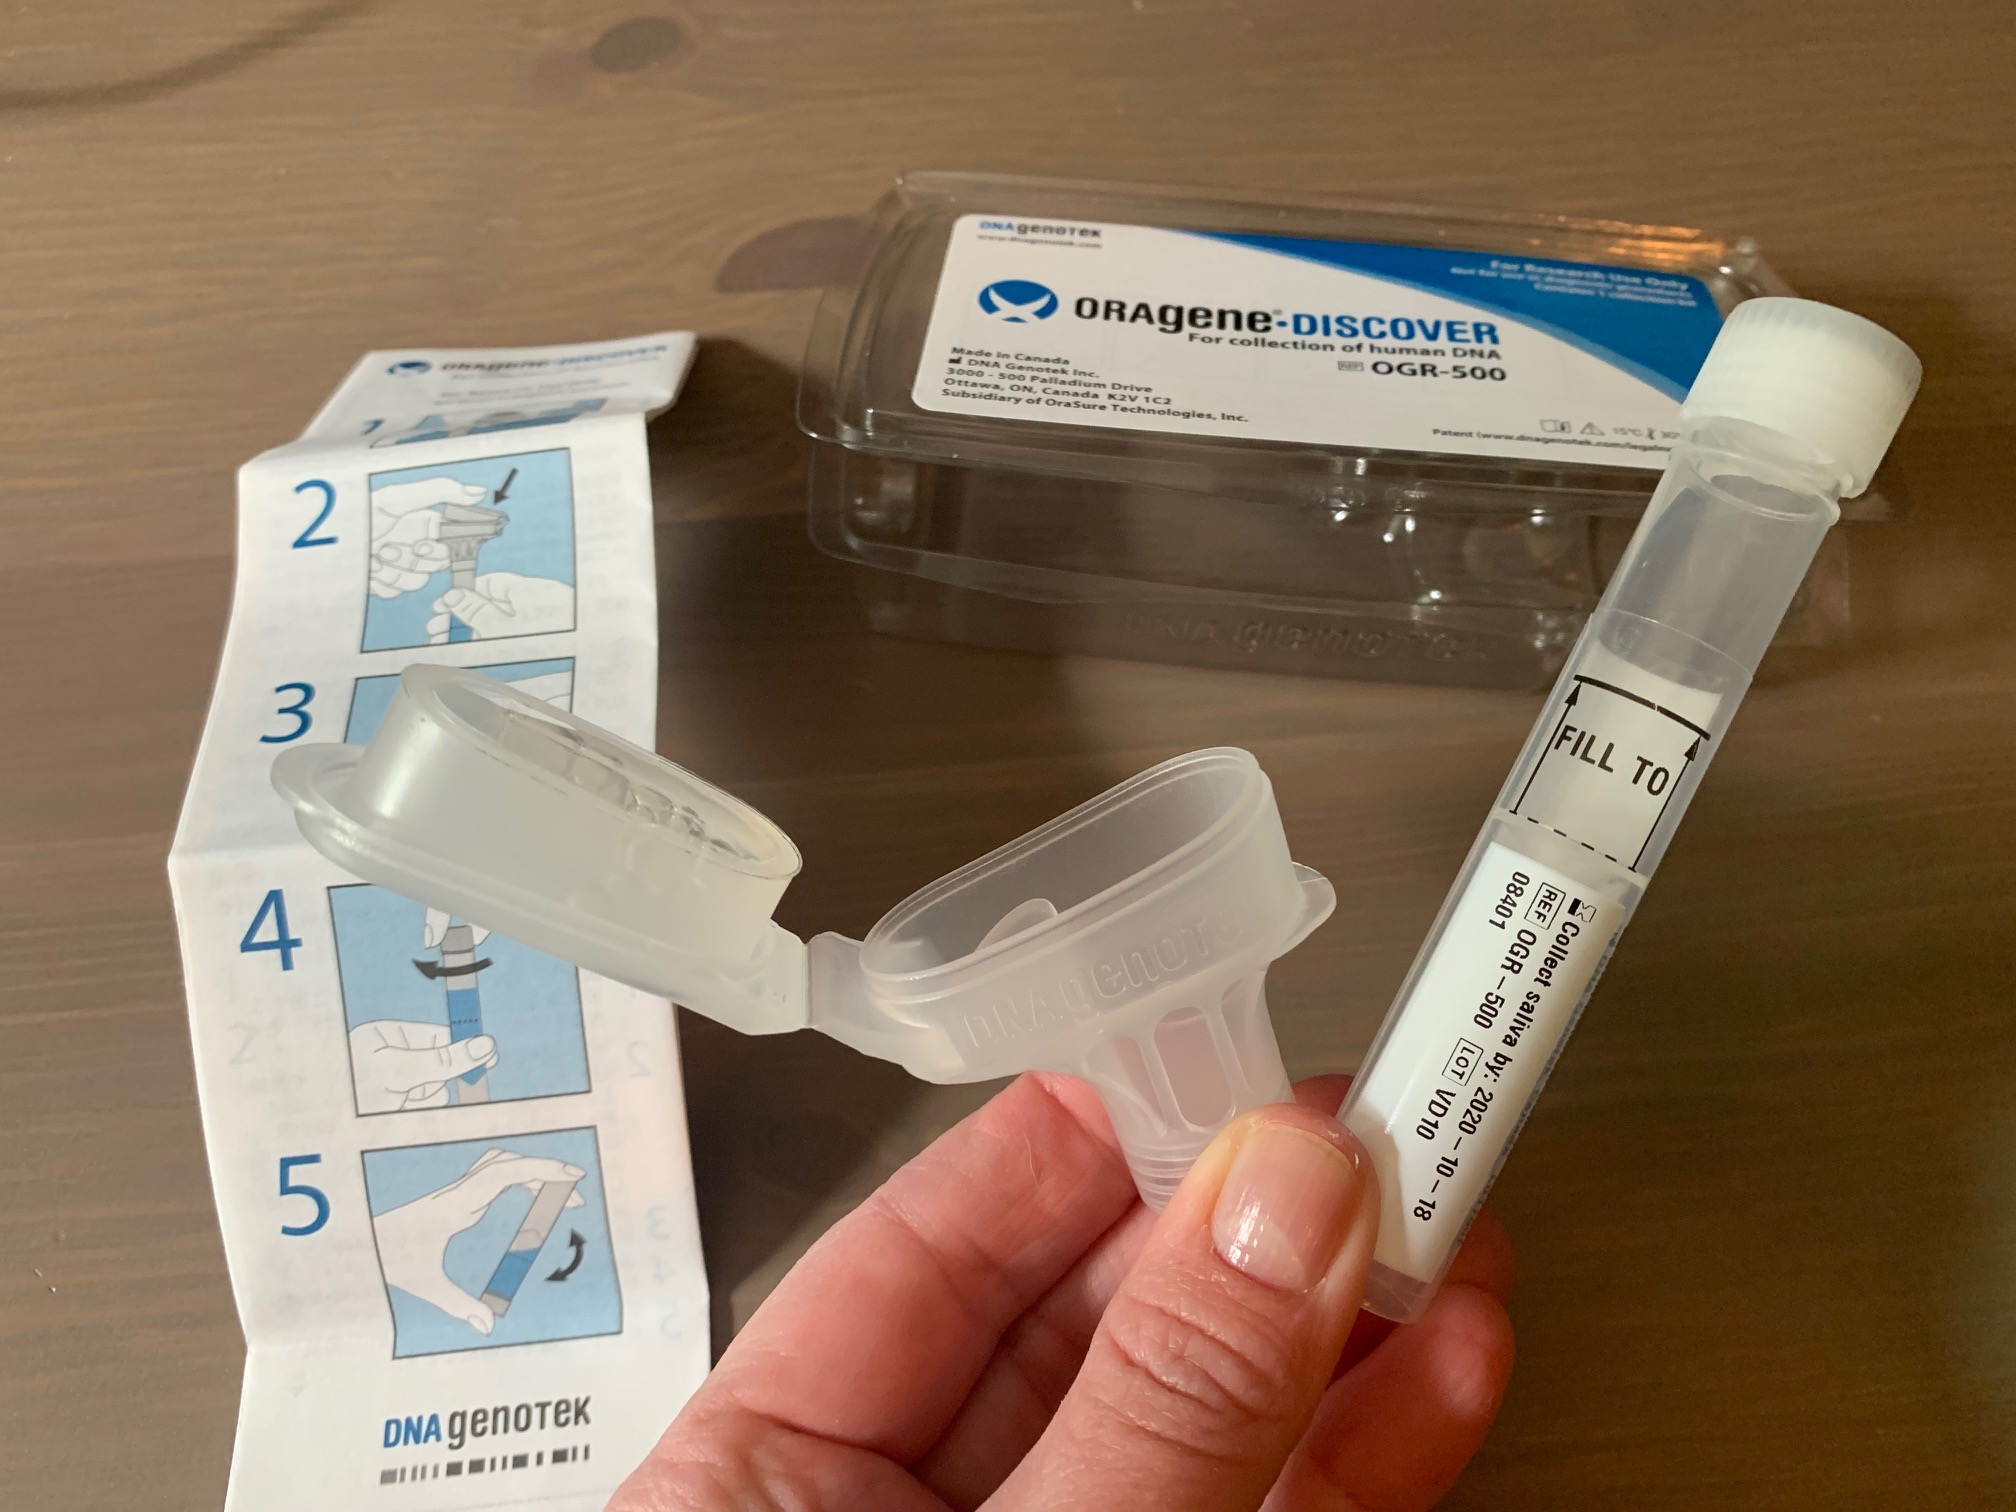
Step 2: Remove the kit and tube from the box
Perhaps not as fun as unboxing that new phone or other purchase, but get your materials in front of you. It should include a cardboard box with a plastic container holding the saliva tube. The tube has marks on the side to indicate the top and bottom of the saliva collection area, a top filled with a liquid that will help get your sample safely to the lab (stabilize your DNA), a box, shipping envelope and shipping label to get the kit back to the lab through FedEx or USPS.
Step 3: Label the tube
Take a sharpie or other pen (preferably non-washable and dark so it’s easy to read) and put your full name and birth date on the tube. Some laboratories have nice neat labels on the tubes already. Others have a simple barcode on the tube and it’s up to you to decide where to put your name. Please do your best to make it legible and to not cover any barcodes on the tube.
Alternatively, you can use a label you have at home- write your name and birth date on a blank label then attach to the tube or use an address label that you have and add your birthday-make sure it’s your name on the label not a parent, partner, spouse, or other household member. Also, please be sure to add the date of your sample.
It’s amazing how many people forget this step. It’s partly the nerves of providing an entirely new sample type and partly the phlebotomist and other healthcare staff would normally handle this part for you at a blood draw. But all spit looks the same and we want to make sure they know it’s your sample. Also, if the tube is not labeled, the laboratory will request a new sample, delaying your results. It helps to do this step earlier in the process, especially if multiple people in the house are providing samples.
Step 4: Provide the sample
Now that you’ve done all the prep work, it’s time to provide the saliva. It is a little weird and awkward, to be sure, and it takes a lot of muscle coordination to consciously spit in a small space. There is a large mouth on top of the collection tube. You must get the liquid part of the saliva over the black line, the bubbles don’t count. Some saliva is very bubbly while other saliva has almost no bubbles. It takes most adults a few minutes to make or produce enough saliva to get the sample over the top line. For those people with dryer mouths, it may take longer, so be patient with yourself.
Some people find it helpful to wait a minute to collect saliva in their mouths to provide more saliva per spit. Others want to spit as soon as they make saliva so they don’t forget and swallow. It’s up to you-there’s no right or wrong way to do this part–but most find it easier to hold a moment and get a larger amount of saliva ready before spitting.
Step 5: Close the tube and package the sample
Once you’ve reached the magic level of spit, aka your liquid saliva is over the magic line, close the lid until you hear a click or pop. This is the lid closing completely and releasing the stabilizing liquid that was in the top. Make sure all that liquid drips down into the tube, then unscrew the top portion. You can discard or throw away the top lid. Now remove the small lid from the small plastic container, it usually has a blue top. Carefully screw on the small lid, making sure to close it tightly. Now shake or invert the tube a number of times to mix the saliva and liquid. This can be a similar motion to mixing your favorite nail polish, mixing a drink, baby bottle, shake weight, or inverting s sample in high school chemistry.
Confirm that your name and birth date are on the tube. Place the tube back inside the plastic container or sample bag. Place the container in the shipping box. Place the shipping box inside the shipping envelope if included. Seal the envelope. Add the shipping label. Call the mail carrier to pick up the kit, or drop off at the nearest FedEx drop box or office or USPS. (Instructions may differ between different laboratories, so please read what is included with your kit. Call us if you’re unsure.)
Tips and Tricks
If you find yourself having difficulty making enough saliva try these:
- Gently massage your cheeks
- Gently gnaw or chew on your tongue
- Think about something sour like your favorite sour candy or lemons
- Think about what you ate last or are going to eat next; imagine the smells, tastes and textures
- Imagine you just finished brushing your teeth and need to spit out the toothpaste
- If you’re really stuck, you can place a few granules of sugar on the tip of your tongue, just enough to get a taste of sweetness, and this will not affect the DNA sample.
There is no right way to get saliva into the tube. There are ways that work better, but especially children are very creative in their sample collection techniques. Go with what works for you as long as the saliva arrives in the tube.
- You can hold the tube up to your lips and gently expel (spit) the saliva into the tube.
- You can hold the tube just below your lips and let gravity help guide the saliva into the tube.
- You can completely cover the tube with your lips (such as a small child drinking from a water bottle). Make sure to keep the tube vertical so the sample does not return home to your mouth.
- You may be able to collect the sample all in one go, but this is rare. Most people cannot produce and hold that much saliva all at once.
- You can show younger children and adults having difficulty providing a sample how to do it by spitting into a nearby cup or sink. I’d encourage children to focus on the tube and explain that this is a special circumstance, and what the normal rules are about spitting, such as no spitting on people or furniture, or whatever your household rules are around this topic.
- In clinic I’ve noticed that most children are very eager to learn and have lots of questions about this process and what it means for after they leave clinic. Be honest and let us know if you come across questions that you need help answering.
Video production, filming, and editing credit: Maxine Stoll.